
Many CAD programs (and other programs for that matter) allow you to save significant time by using macros to automate repetitive tasks. In this column, we’ll focus on MicroStation PowerDraft for the sake of providing a clear example. If you use another CAD program, it may offer a similar macro recorder tool that lets you record multiple steps and play them back to perform the tasks in one step — all without typing any code. Read this column for an overview of macros, and then check for specifics in your CAD package.
Macros are one of several tools available if you’re interested in customizing or programming in a CAD environment. (See CAD Programming: Intro for 2021 for an overview of other options.) You don’t have to know programming to use macros, but they can be a great introduction to programming. In fact, MicroStation lets you convert a recorded macro to a Visual Basic for Applications (VBA) project for further editing and customization. More on that later.
To get started, let’s assume you want to automate insertion of some text in your drawings. This could be a particular note or label that you use over and over. Instead of typing the note each time or copying and pasting the text, you can create a simple macro to accomplish the task with the following steps.
Record the Macro
-
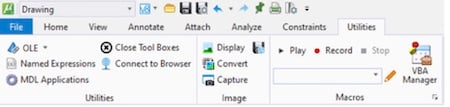
With MicroStation running and a blank drawing open, click the Utilities tab to display the Macros pane.
-
Click Record to start recording your macro.
-
Click the Annotate tab and select the Place Text tool.
-
In the Text Editor window, type some text, such as, “This is a note for my drawing.”

-
Click a location in the drawing to place the text.
-
Right-click to exit the command.
-
Click the Utilities tab again, and click Stop to stop recording.
-
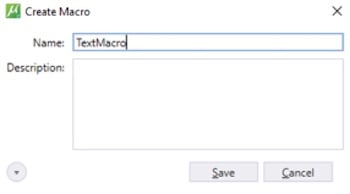
When prompted to save the macro, type in a name, such as “TextMacro” and click Save.
Congratulations! You’ve recorded a macro. Now you can play it back to see what you’ve done.
Play the Macro
-
Delete the text you placed previously while recording the macro.
-
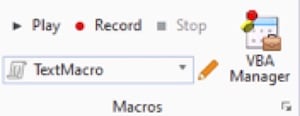
In the Utilities tab, click Play.
-
View the text placed in the drawing.

If this is your first macro, you might be wondering what you’ve achieved. You’ve simply executed a MicroStation command from a macro instead of the normal menu command. The text is always placed at the same location — not providing much value yet. You can increase the value by customizing the macro so you can select a location. To do this, use a MicroStation feature that lets you promote a macro script to a VBA project for further editing and customization.
Promote the Macro
-
In the Utilities tab, click the pencil icon next to your macro name.
-
In the window that appears, click the Promote icon to promote your macro to VBA.
-
In the Utilities tab, click the VBA Manager icon.
-
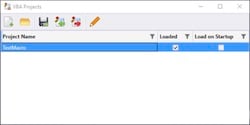
In the VBA Projects window, select your macro and make sure the Loaded box is checked.
-
Click the Pencil icon to edit the VBA code for your macro.
-
In the VBA window, find your macro by expanding the modules listed on the left side of the window.
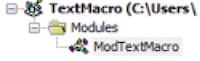
-
Double-click on the macro module to display the code in the VBA window.
Sub BmrTextMacro()
Dim startPoint As Point3d
Dim point As Point3d, point2 As Point3d
Dim lngTemp As Long
Dim oMessage As CadInputMessage
' Send a keyin that can be a command string
CadInputQueue.SendKeyin "TEXTEDITOR PLACE "
' XX-MacroComment_Header-XX
' XX-MacroComment_InsertText-XX
CadInputQueue.SendKeyin "TEXTEDITOR PLAYCOMMAND INSERT_TEXT ""This is a note for my drawing."""
' Coordinates are in master units
startPoint.X = 5.85984028573692
startPoint.Y = 1.8561289704424
startPoint.Z = 0#
' Send a data point to the current command
point.X = startPoint.X
point.Y = startPoint.Y
point.Z = startPoint.Z
CadInputQueue.SendDataPoint point, 1
' Send a reset to the current command
CadInputQueue.SendReset
CommandState.StartDefaultCommand
End Sub
If this looks like gibberish, don’t despair. You don’t really need to understand it all just yet — only the portion you want to customize.
Customize the Macro
To make the macro more useful, let’s explore how to let the user determine the location of the text.
-
In the VBA window, locate the three lines starting with the term “startPoint…” These lines set the text location at the coordinates you selected when recording the macro.
-
Insert an apostrophe (‘) at the beginning of these lines. This converts these lines to comments that are not executed.
-
Add a line just below the commented lines to prompt the user to select a point. (Your coordinate values may differ from this example, depending on the location you picked.
'startPoint.X = 5.85984028573692
'startPoint.Y = 1.8561289704424
'startPoint.Z = 0#
startPoint = CadInputQueue.GetInput(msdCadInputTypeDataPoint).point -
Click the Play icon in the VBA window and notice how the program allows you to select a location for the text.
-
Click the Save icon to save your work in a VBA program.
Here are some brief highlights of key lines in the macro. If you’ve done any programming, this should be familiar territory. If not, take a deep breath for some VBA programming basics.
The lines starting with “Dim…” are dimension statements that declare variables to be used in the macro — such as the startPoint variable that determines the text location. The term “CadInputQueue …” refers to an object in the MicroStation application programming interface (API) that can be manipulated with various methods and properties.
Methods used in this macro include “SendKeyin,” which sends a command as if you were keying it in at the keyboard, and “SendDataPoint,” which sends information about the location identified by the variable called point.
Where to Go Next
If you’d like to learn more about macros and VBA programming in the MicroStation environment, Bentley has some resources online. For starters, check out: Developers and Programming - Bentley Communities. You can also experiment with recording macros using other MicroStation commands. In general, most MicroStation tasks can be recorded as macros and further customized with VBA code.
General information about VBA is prevalent on the Internet and in numerous books. Because VBA was originally introduced by Microsoft for automating tasks in Microsoft Office, many of the same concepts discussed in this article apply to automating tasks in Microsoft Word, Excel, and Access, as well as AutoCAD and other VBA-enabled products. Check out the following on Microsoft’s web site: Office Visual Basic for Applications (VBA) reference | Microsoft Docs and Find Help on using the Visual Basic Editor (microsoft.com).
Also note that VBA has some limitations and is not intended for large, complex programs. It also faces a somewhat uncertain future among some software vendors, but has managed to survive for many years after rumors of its demise first surfaced. For more serious programmers, Visual Studio.NET offers more versatility and more robust features, and also appears to have wide support for the foreseeable future.
For more in-depth MicroStation programming, Bentley’s MicroStation Development Libraries (MDL) provide additional power. APIs are available in both native (C++ and C) and managed (.NET) environments, providing access to the MicroStation object model and DGN design data.
In future articles, I'll continue to explore additional facets of CAD programming, including both AutoCAD and MicroStation examples. If you would like to suggest a topic, feel free to send me an e-mail.


Share This Post