

Editor’s Note: Welcome to Cadalyst's blog series by Patrick Hughes, A CAD Dinosaur's Journey into Modern Times.” In this three-month series, Hughes chronicles his transition from AutoCAD R14 to v2015 and from an outdated PC to a state-of-the-art professional workstation. Follow along and enjoy!
 As you know by now I’m a dinosaur. We T-Rexes like to eat meat and I’ve been anxious to sink my teeth into the REAL meat of AutoCAD 2015. I knew there would be plenty of meaty stuff in 2015. I was right, and it’s tasty too.
Lately I’ve been gnawing on AutoCAD’s solid modeling tools and it’s been a treat. Since the early 1990’s, I've used AutoCAD for my machine design work using simple wireframes -- I preferred to not even use polylines. After a while, I finally committed to solids and began to appreciate the benefits of doing so. I can’t say it was easy. Early versions of AutoCAD right out of the box tended to be a little cumbersome and required some nimble AutoLISP programming.
AutoCAD 2015 comes with two Workspaces for working in 3D: 3D Basics and 3D Modeling. Both 3D Workspaces present a plethora of tools on the ribbon to help you get your work done. Because there are so many new (to this crusty old beast) 3D tools, what I find especially useful are the popup Help topics with graphics that appear whenever you hover over a tool for a slightly extended amount of time (introduced in AutoCAD 2010). These pop-up tool tips are pleasing to this dino’s eyes!
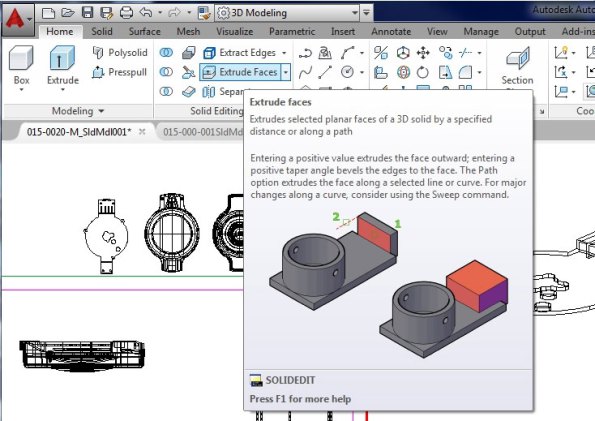
The popups make it easy to learn what AutoCAD can do and they make it easy to start using these new tools.
One of my first discoveries when I began using AutoCAD 2015 is that I can now edit solids, for instance I can easily size or stretch a solid using grips.
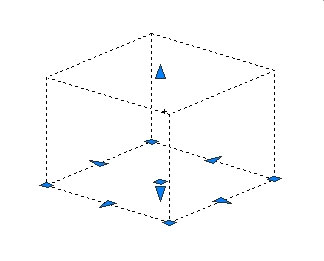
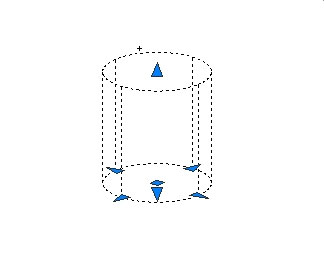
The arrow grips let you stretch the solid in the given direction. In the case of the cylinder, you can easily resize the diameter. In AutoCAD Release 14 these operations could get tedious and often it was more efficient to reconstruct the solid.
Change is Constant
Once a solid has been unioned with other solids to form a compound solid body, these stretch grips disappear.
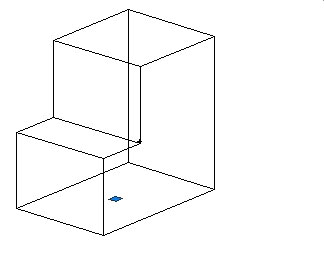
That made for a very sad dino. That is until I discovered Presspull. After issuing the Presspull command, you can select a face of the solid and stretch it further than my tiny arms will ever reach. Here's the operation in process.

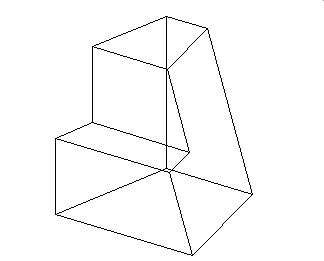
Oh, but wait! There’s more! What if I need to slope one of these sides? No sweat off of these brows (wait, do dinos even have sweating brows? Hmmm….). In any case, just select Taper Faces from the ribbon, click a few times, enter an angle, and the job is done.
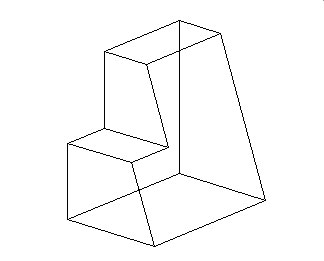
What’s that you say? You want to rotate that face along the sloped edge? Here you go, Start Solidedit, select Face, enter Rotate, pick the axis of rotation, and enter the rotation angle.
I’m telling you, I could have fun doing this all day. Back in Release 14 days, stretching a solid involved making a copy of the solid, moving it to the desired position, and then either subtracting or unioning the copy, depending on the desired results. Tapering a face often involved setting a UCS, slicing the solid -- often keeping both sides of the resulting slice (just in case you needed to stitch things back together), and deleting the side you didn’t want. I’m glad those days are over.
These tools couldn’t have come at a better time. Historically most of the machine design work I perform consists of rather simple shapes. A new job I’ve been assigned involves creating a few molded plastic parts. Now, I know what a molded plastic part is and how they’re made. I know the die requires draft angles and fillets, and the shape itself can be complex with curved surfaces and all sorts of other considerations. I’m finding AutoCAD 2015 gives me the means to create a design that while I could have eventually done in Release 14, I doubt these arms could have done it nearly as easily.
Rawrrr!
In closing, I’m discovering new design capabilities on a near daily basis. Even better, I’m able to apply them to my work as I get acquainted with them, creating parts and components in ways I haven't previously thought of. You might say I’m becoming quite the modern dino.
_________________
About the author: Patrick Hughes, machine designer and owner of Engineered Design Solutions in Rockford, Illinois, has worked with AutoCAD since 1991. He has developed a number of AutoLISP and other software solutions to automate his workflow and increase productivity, including the commercially available time tracking program, CadTempo.


